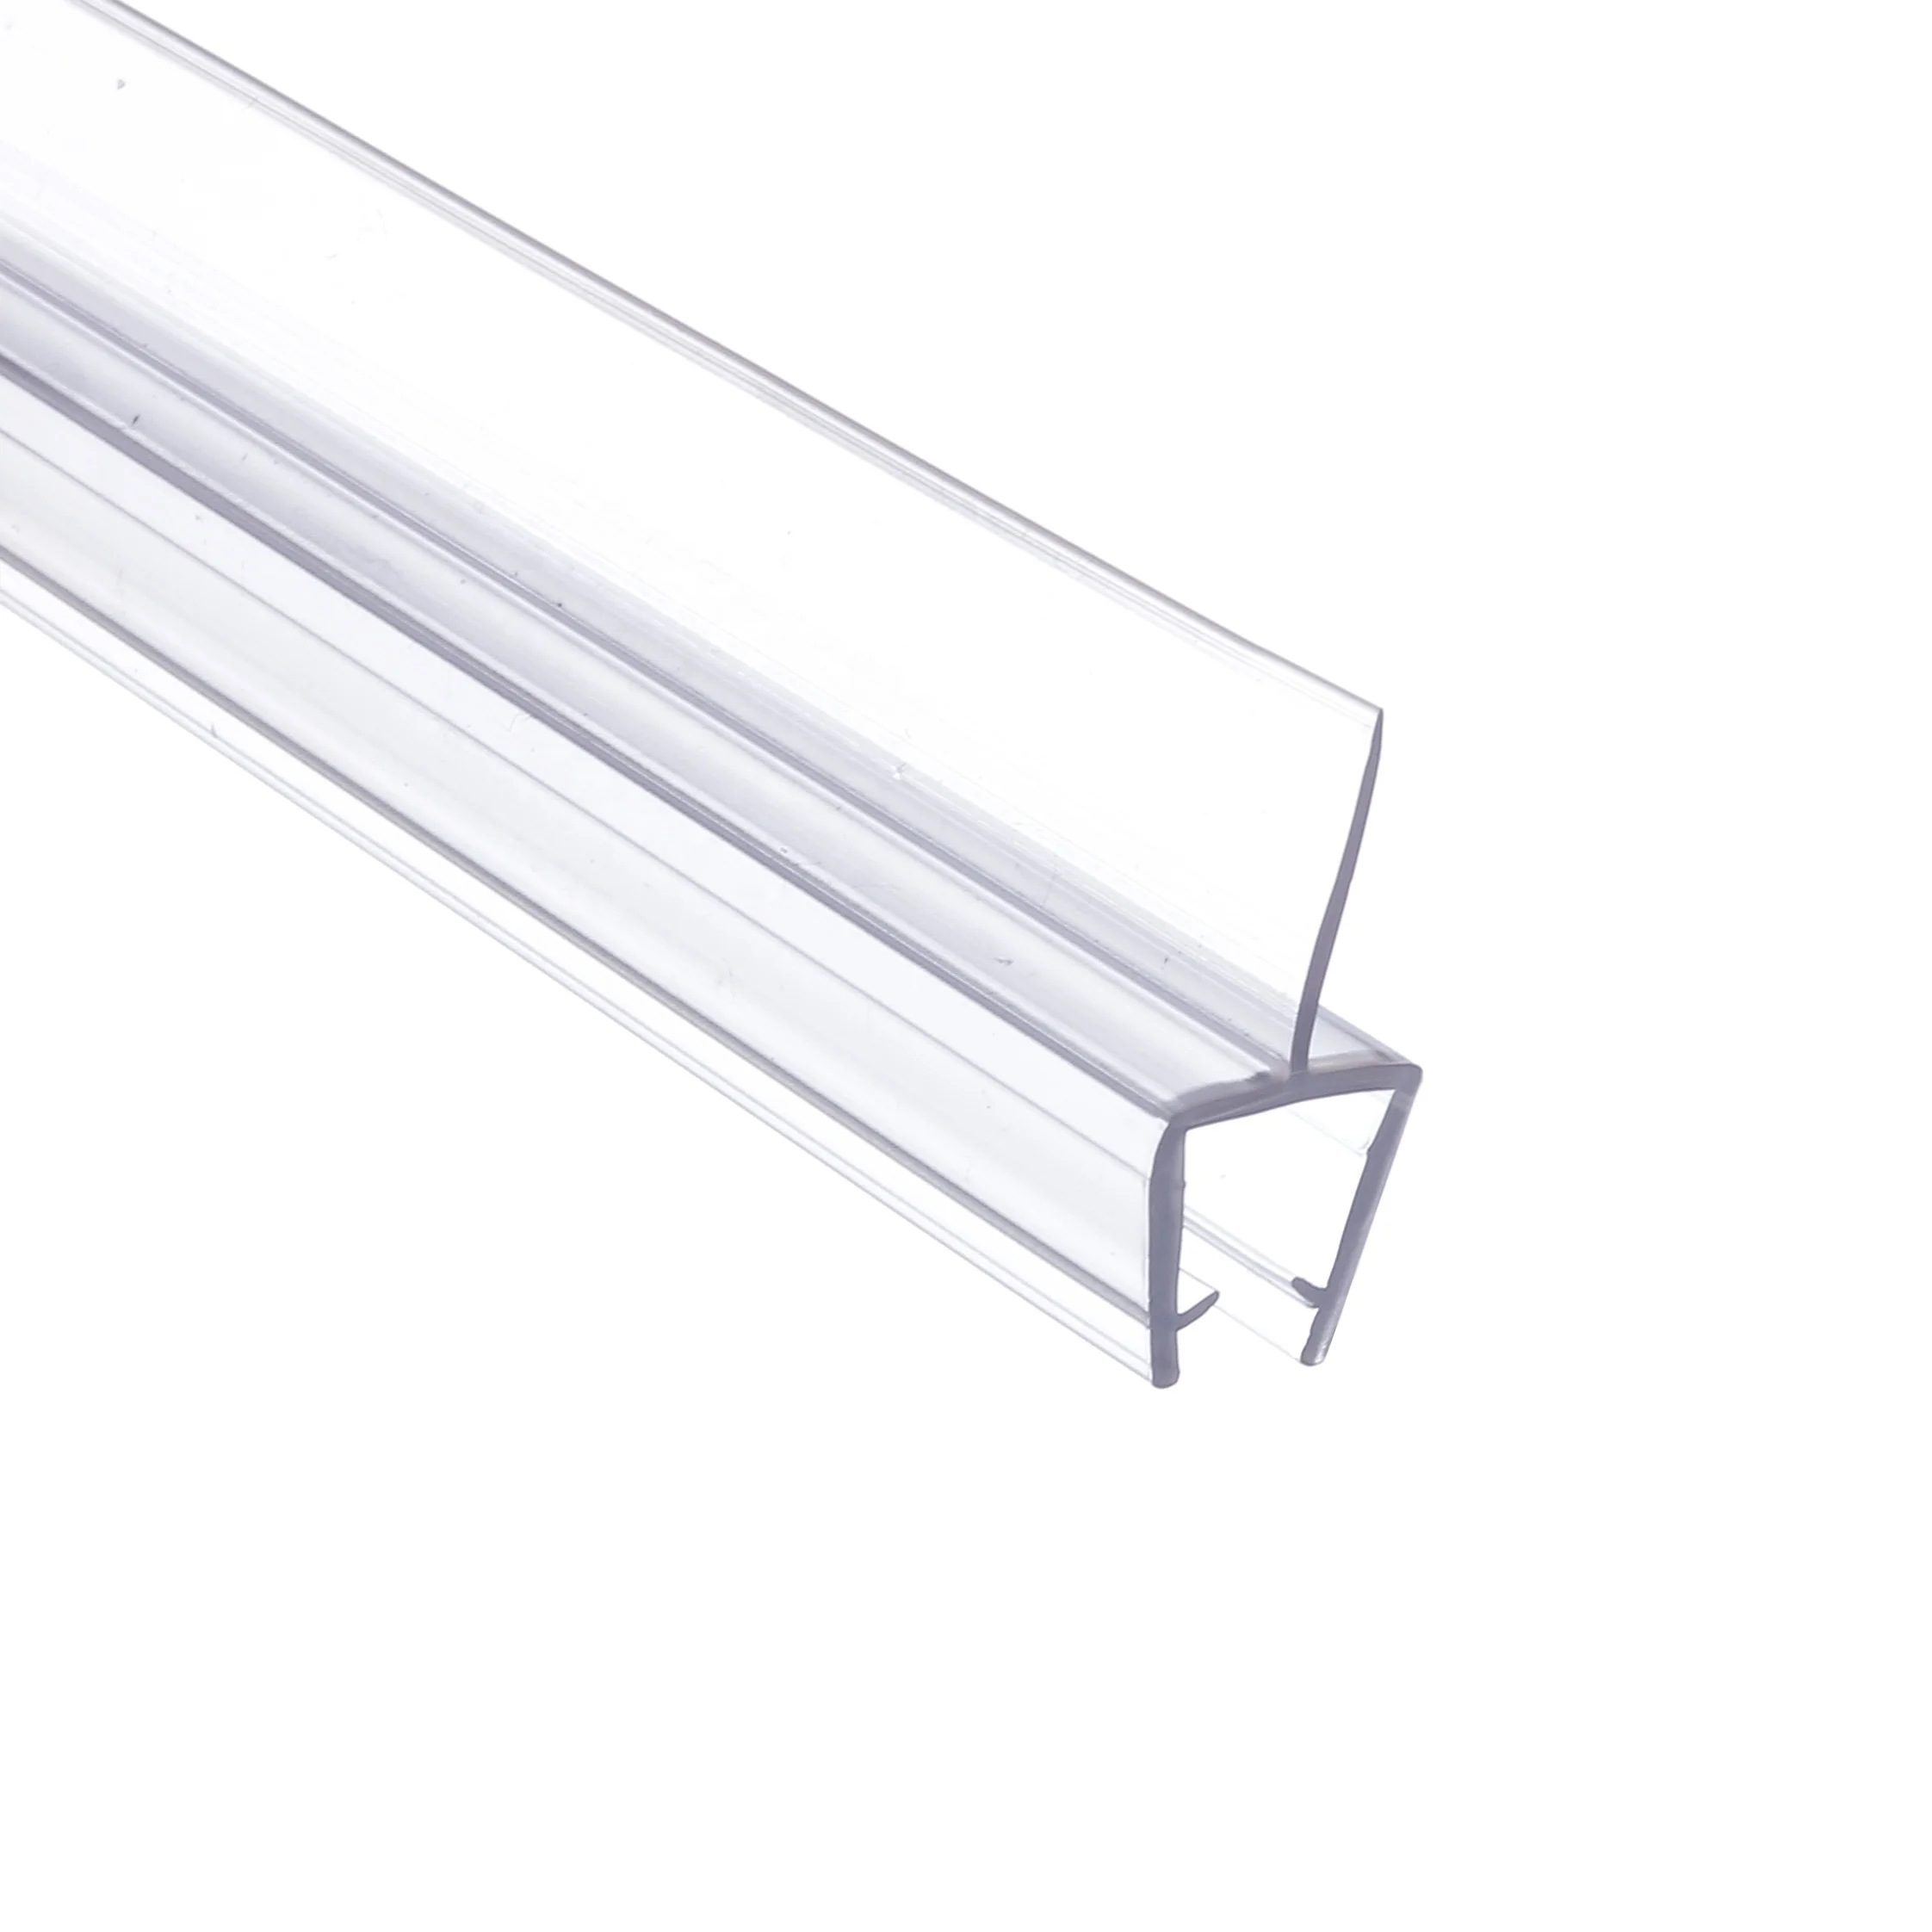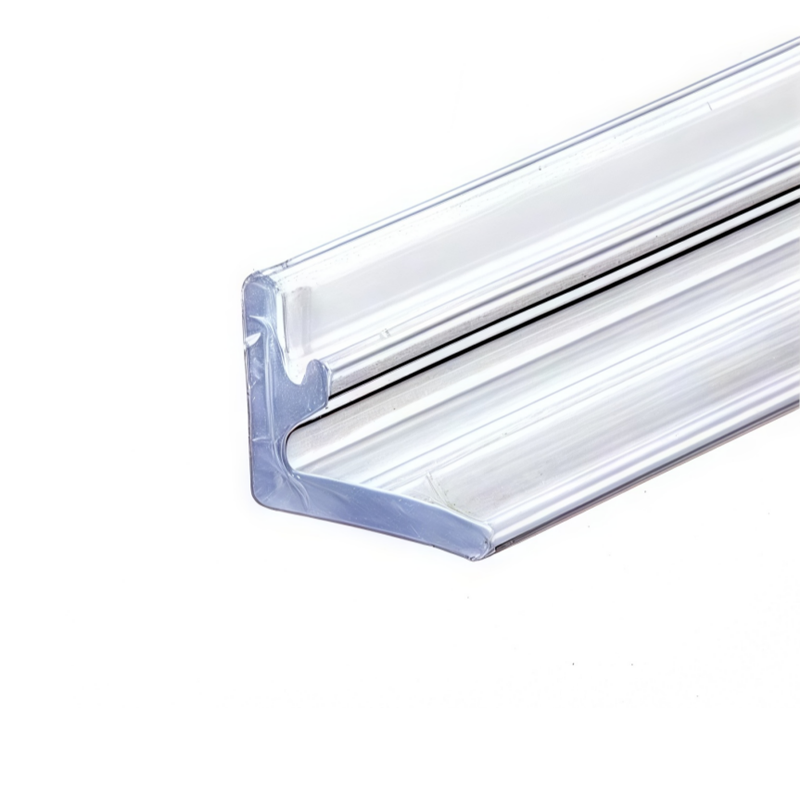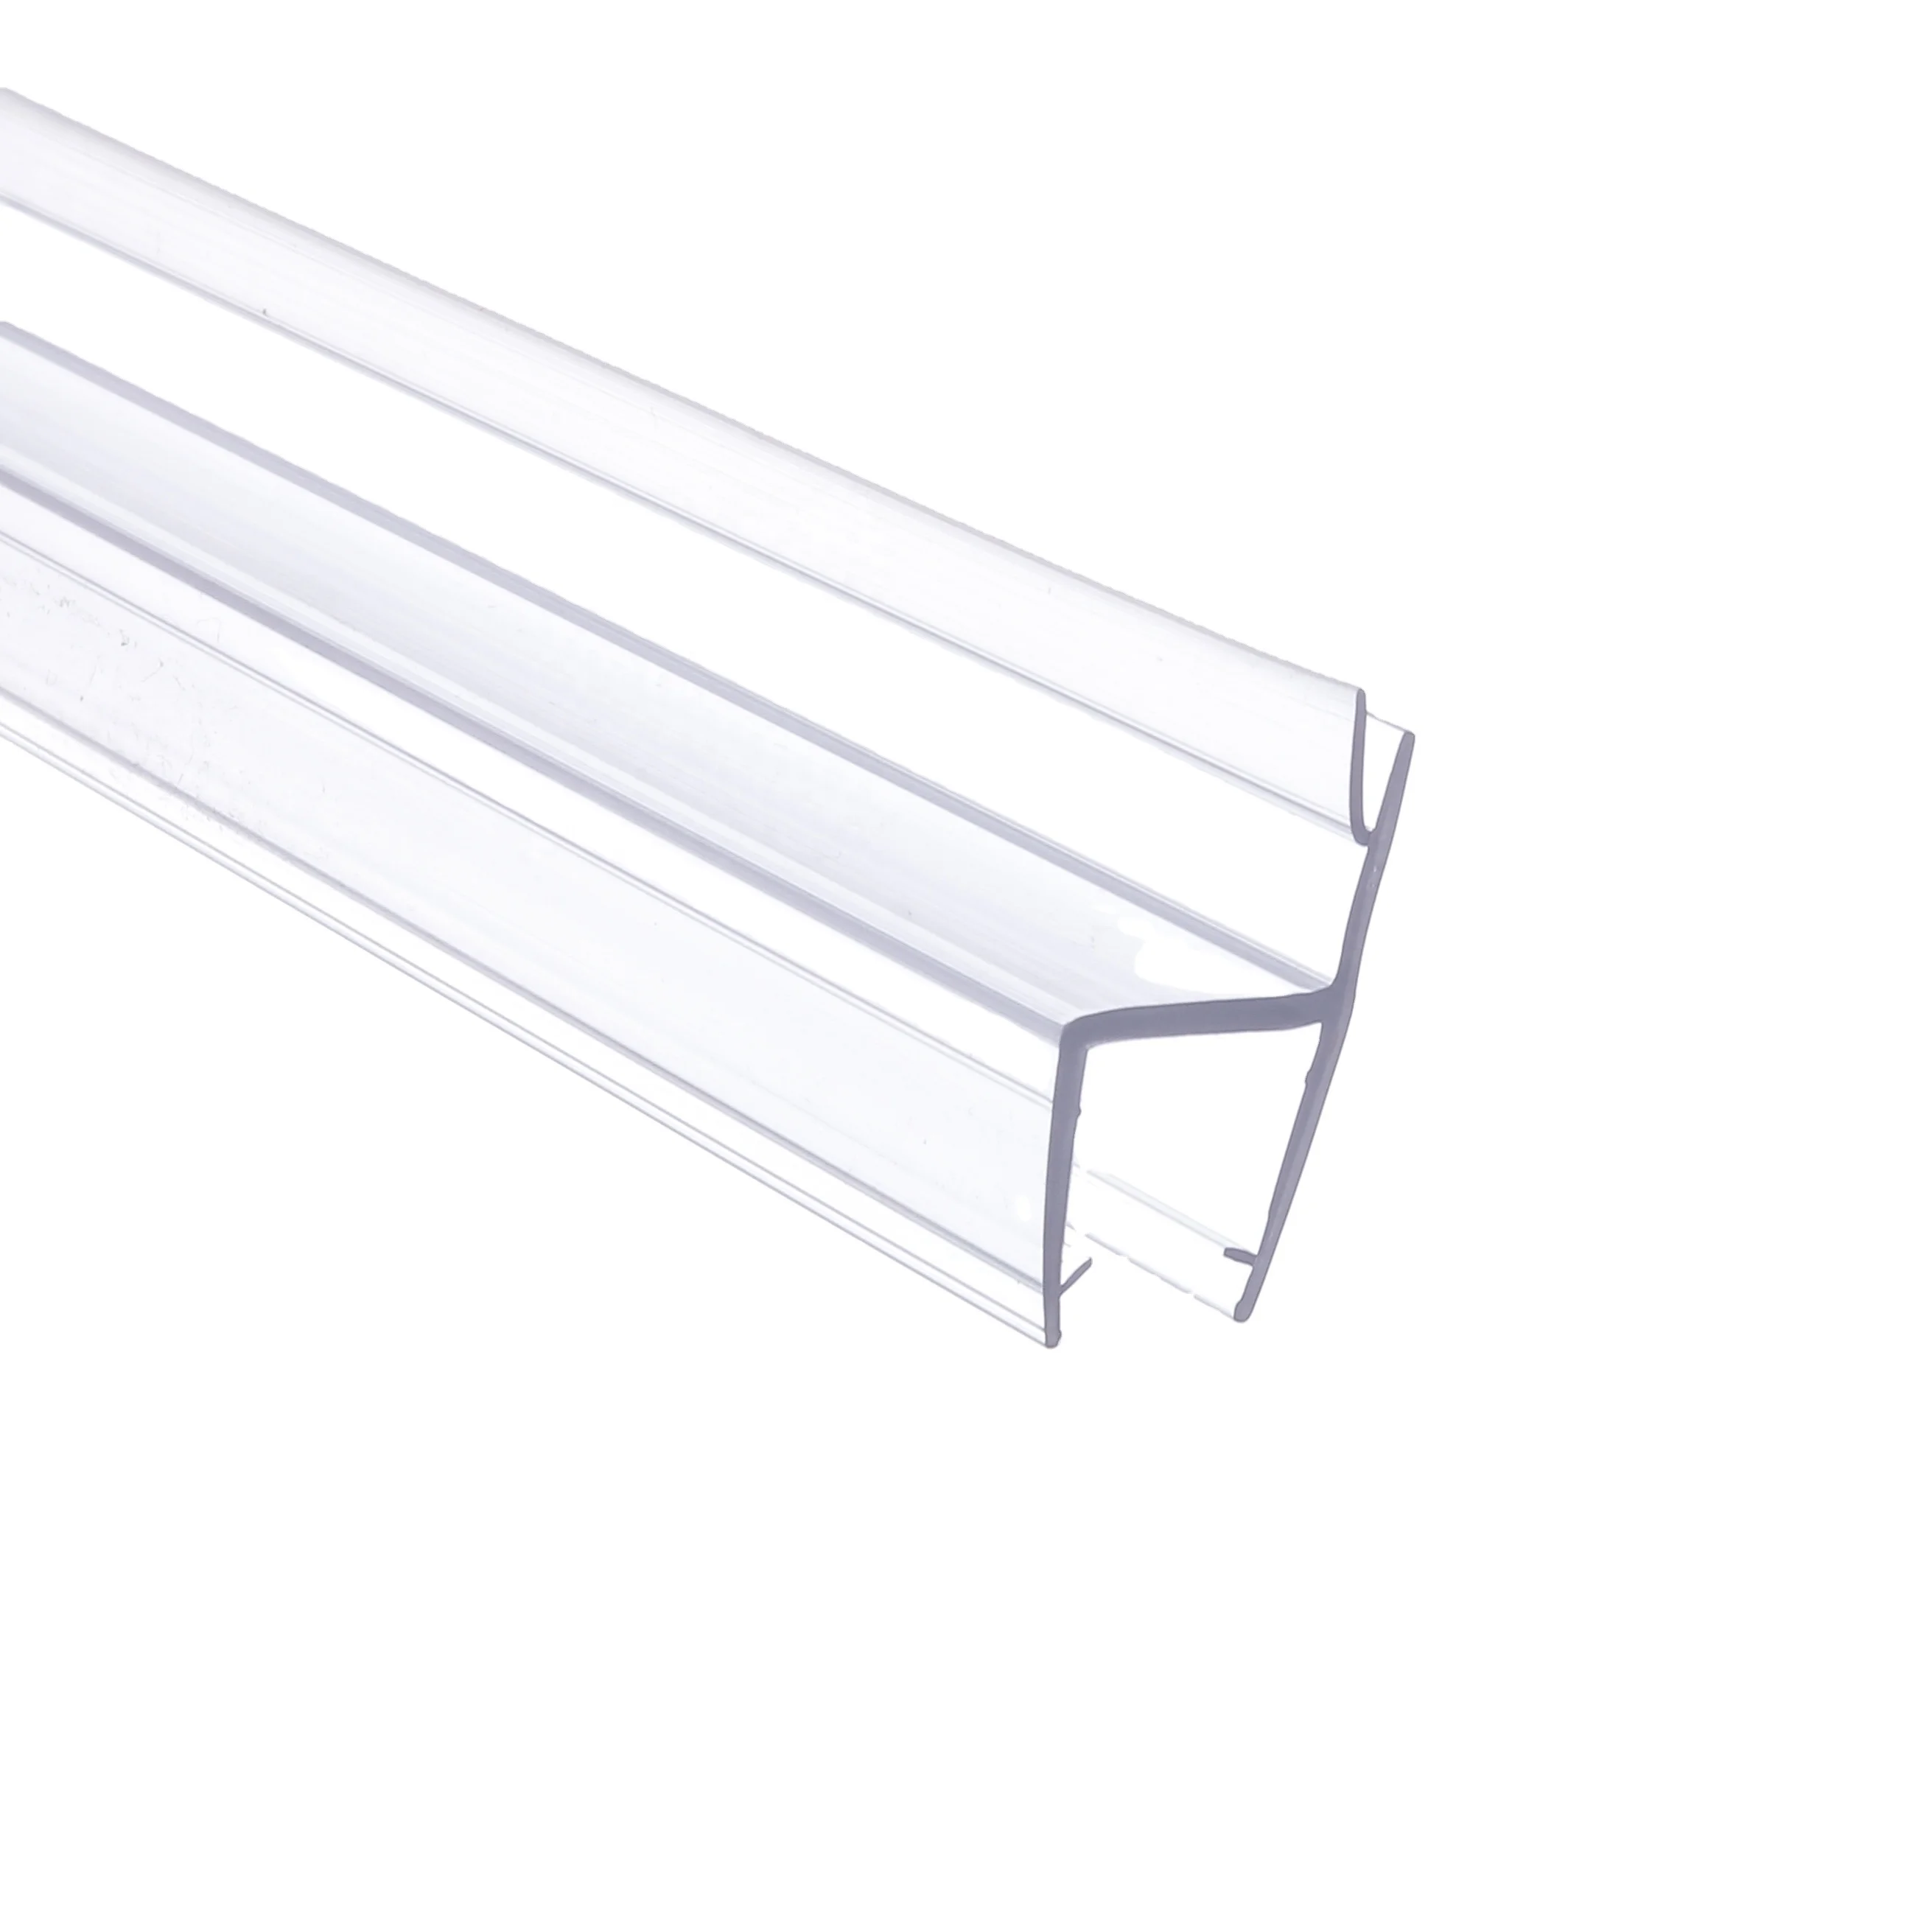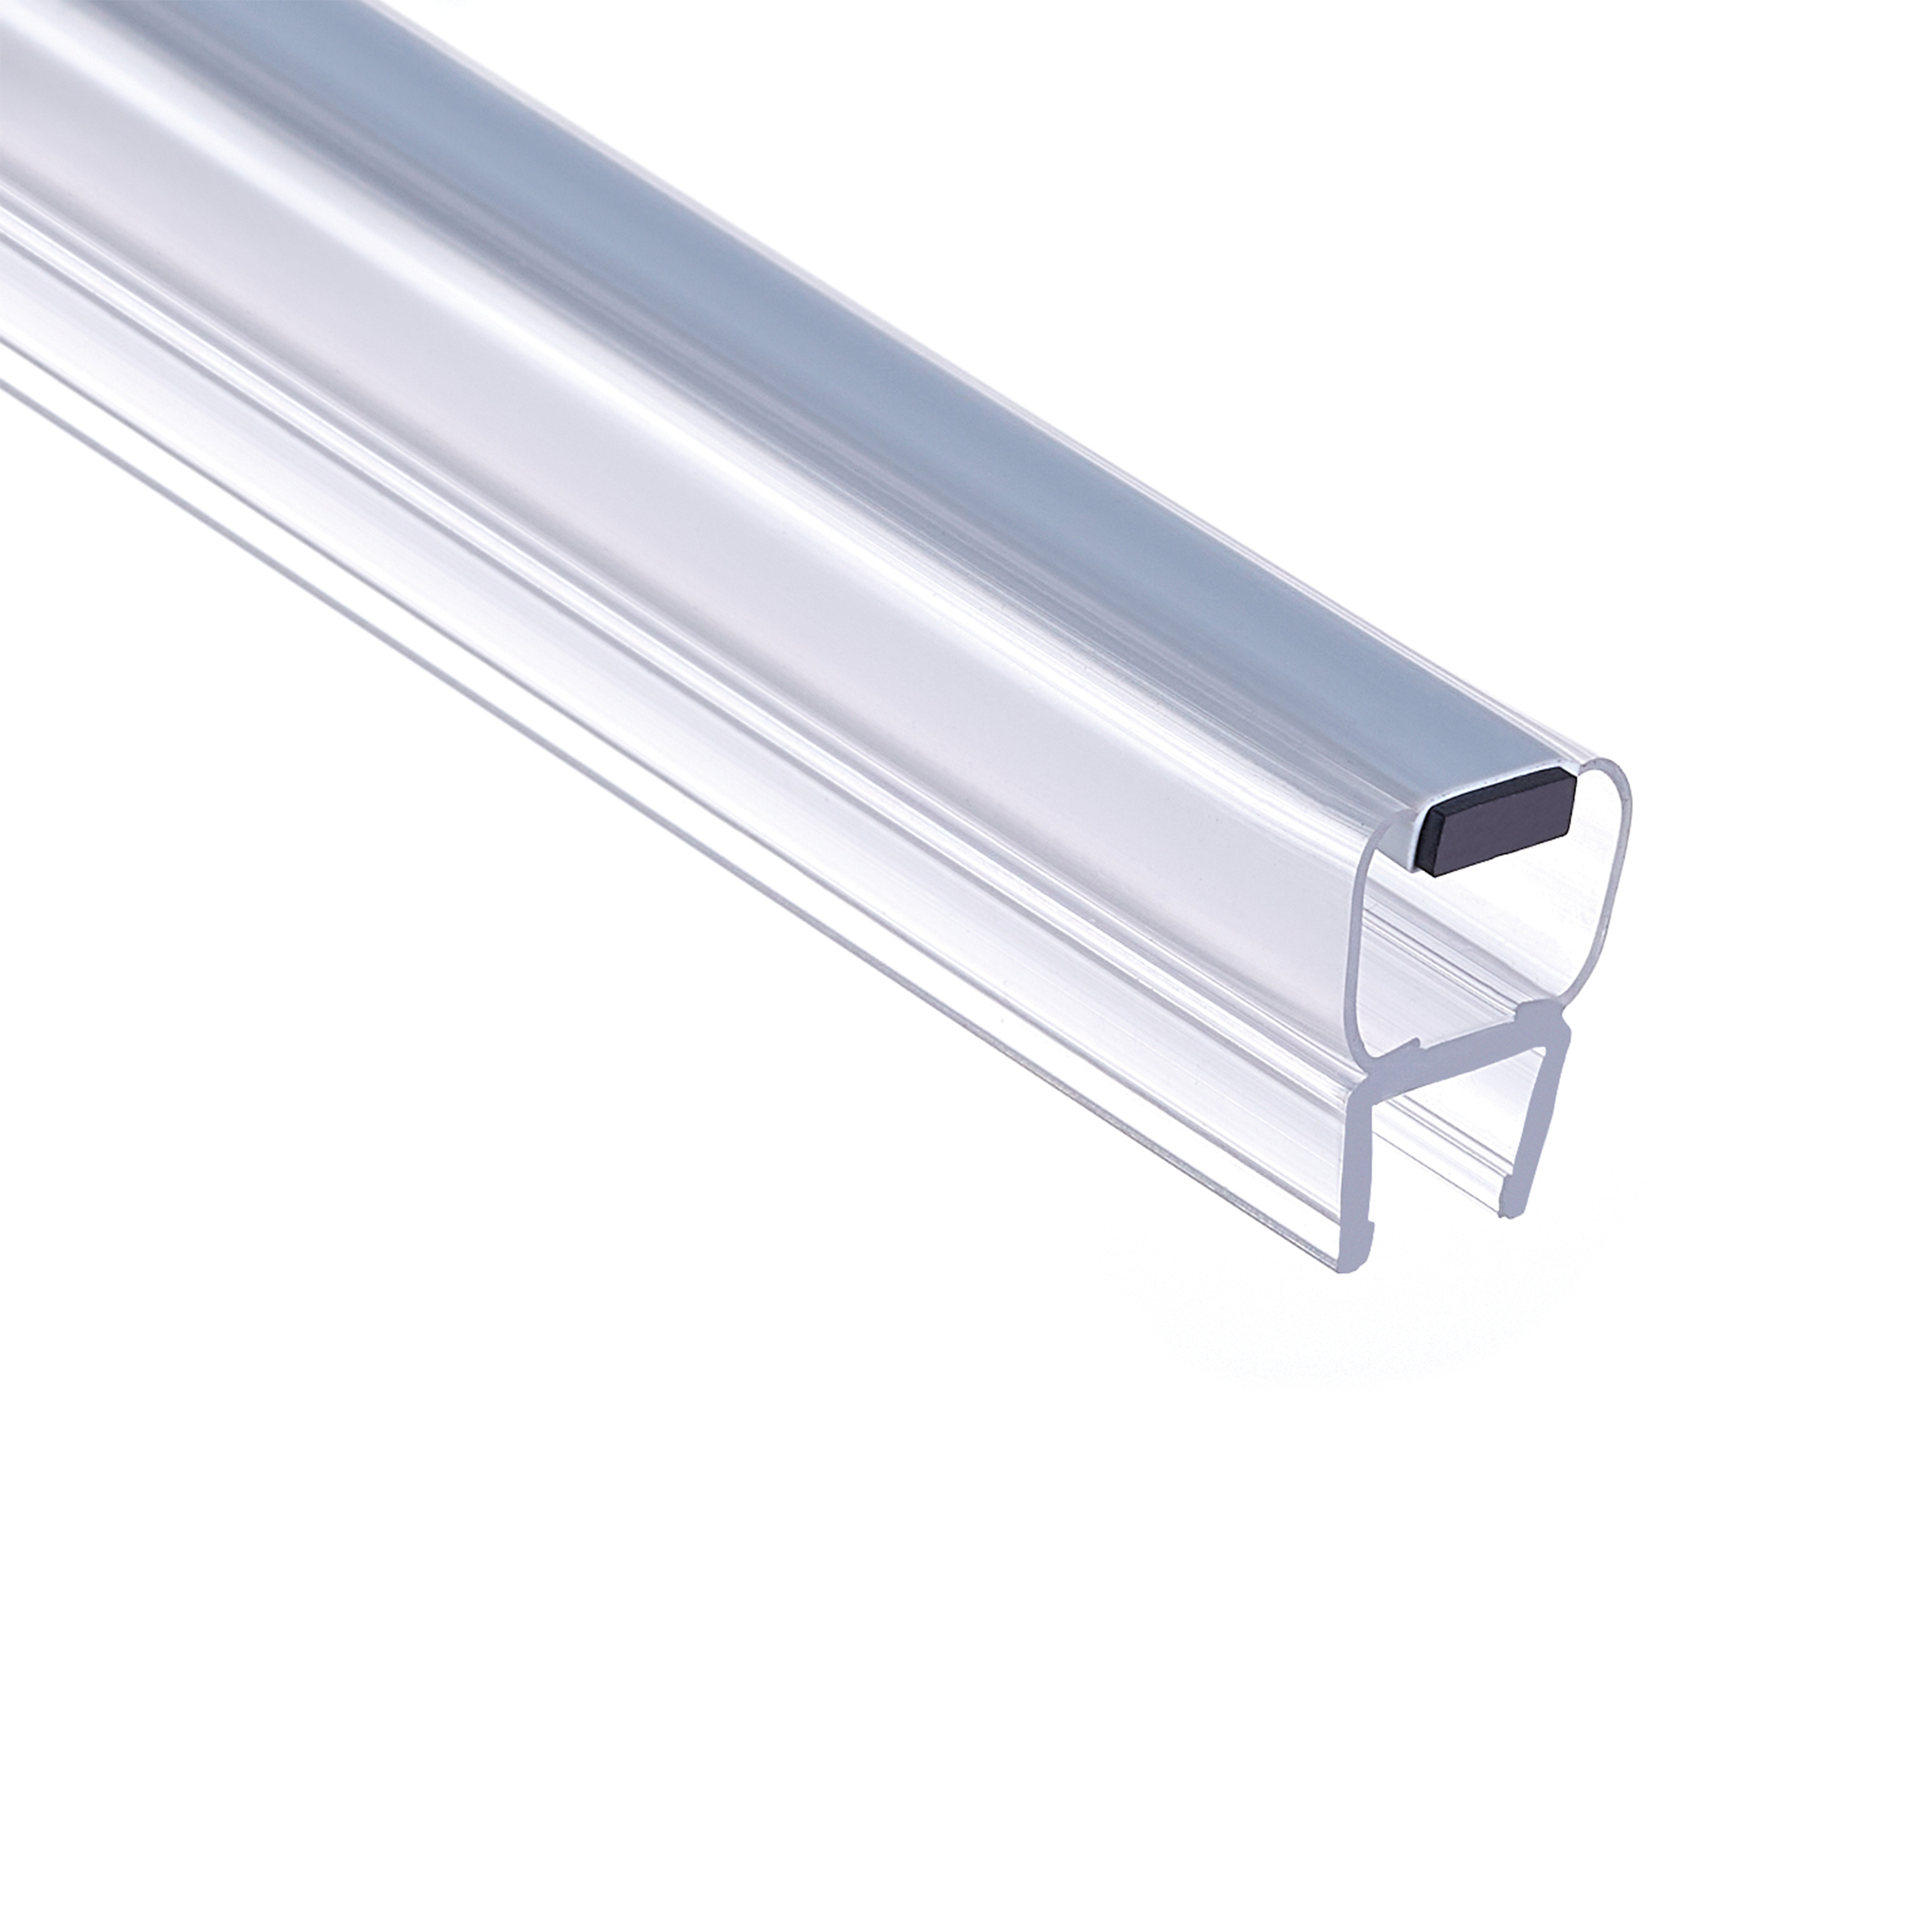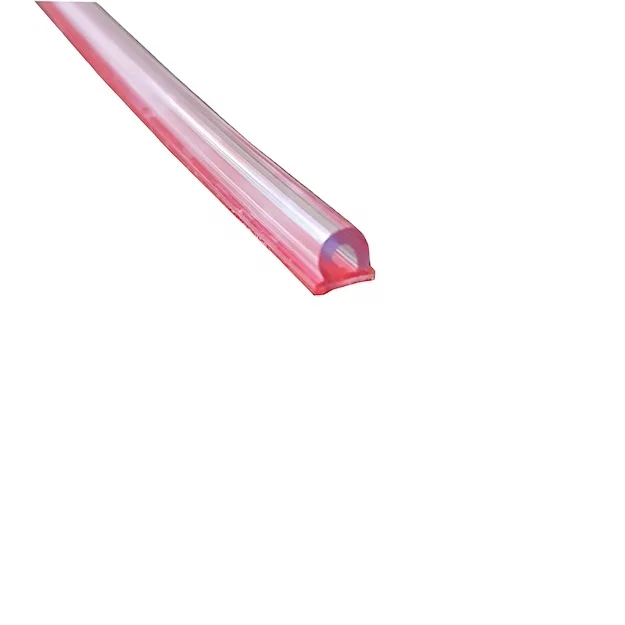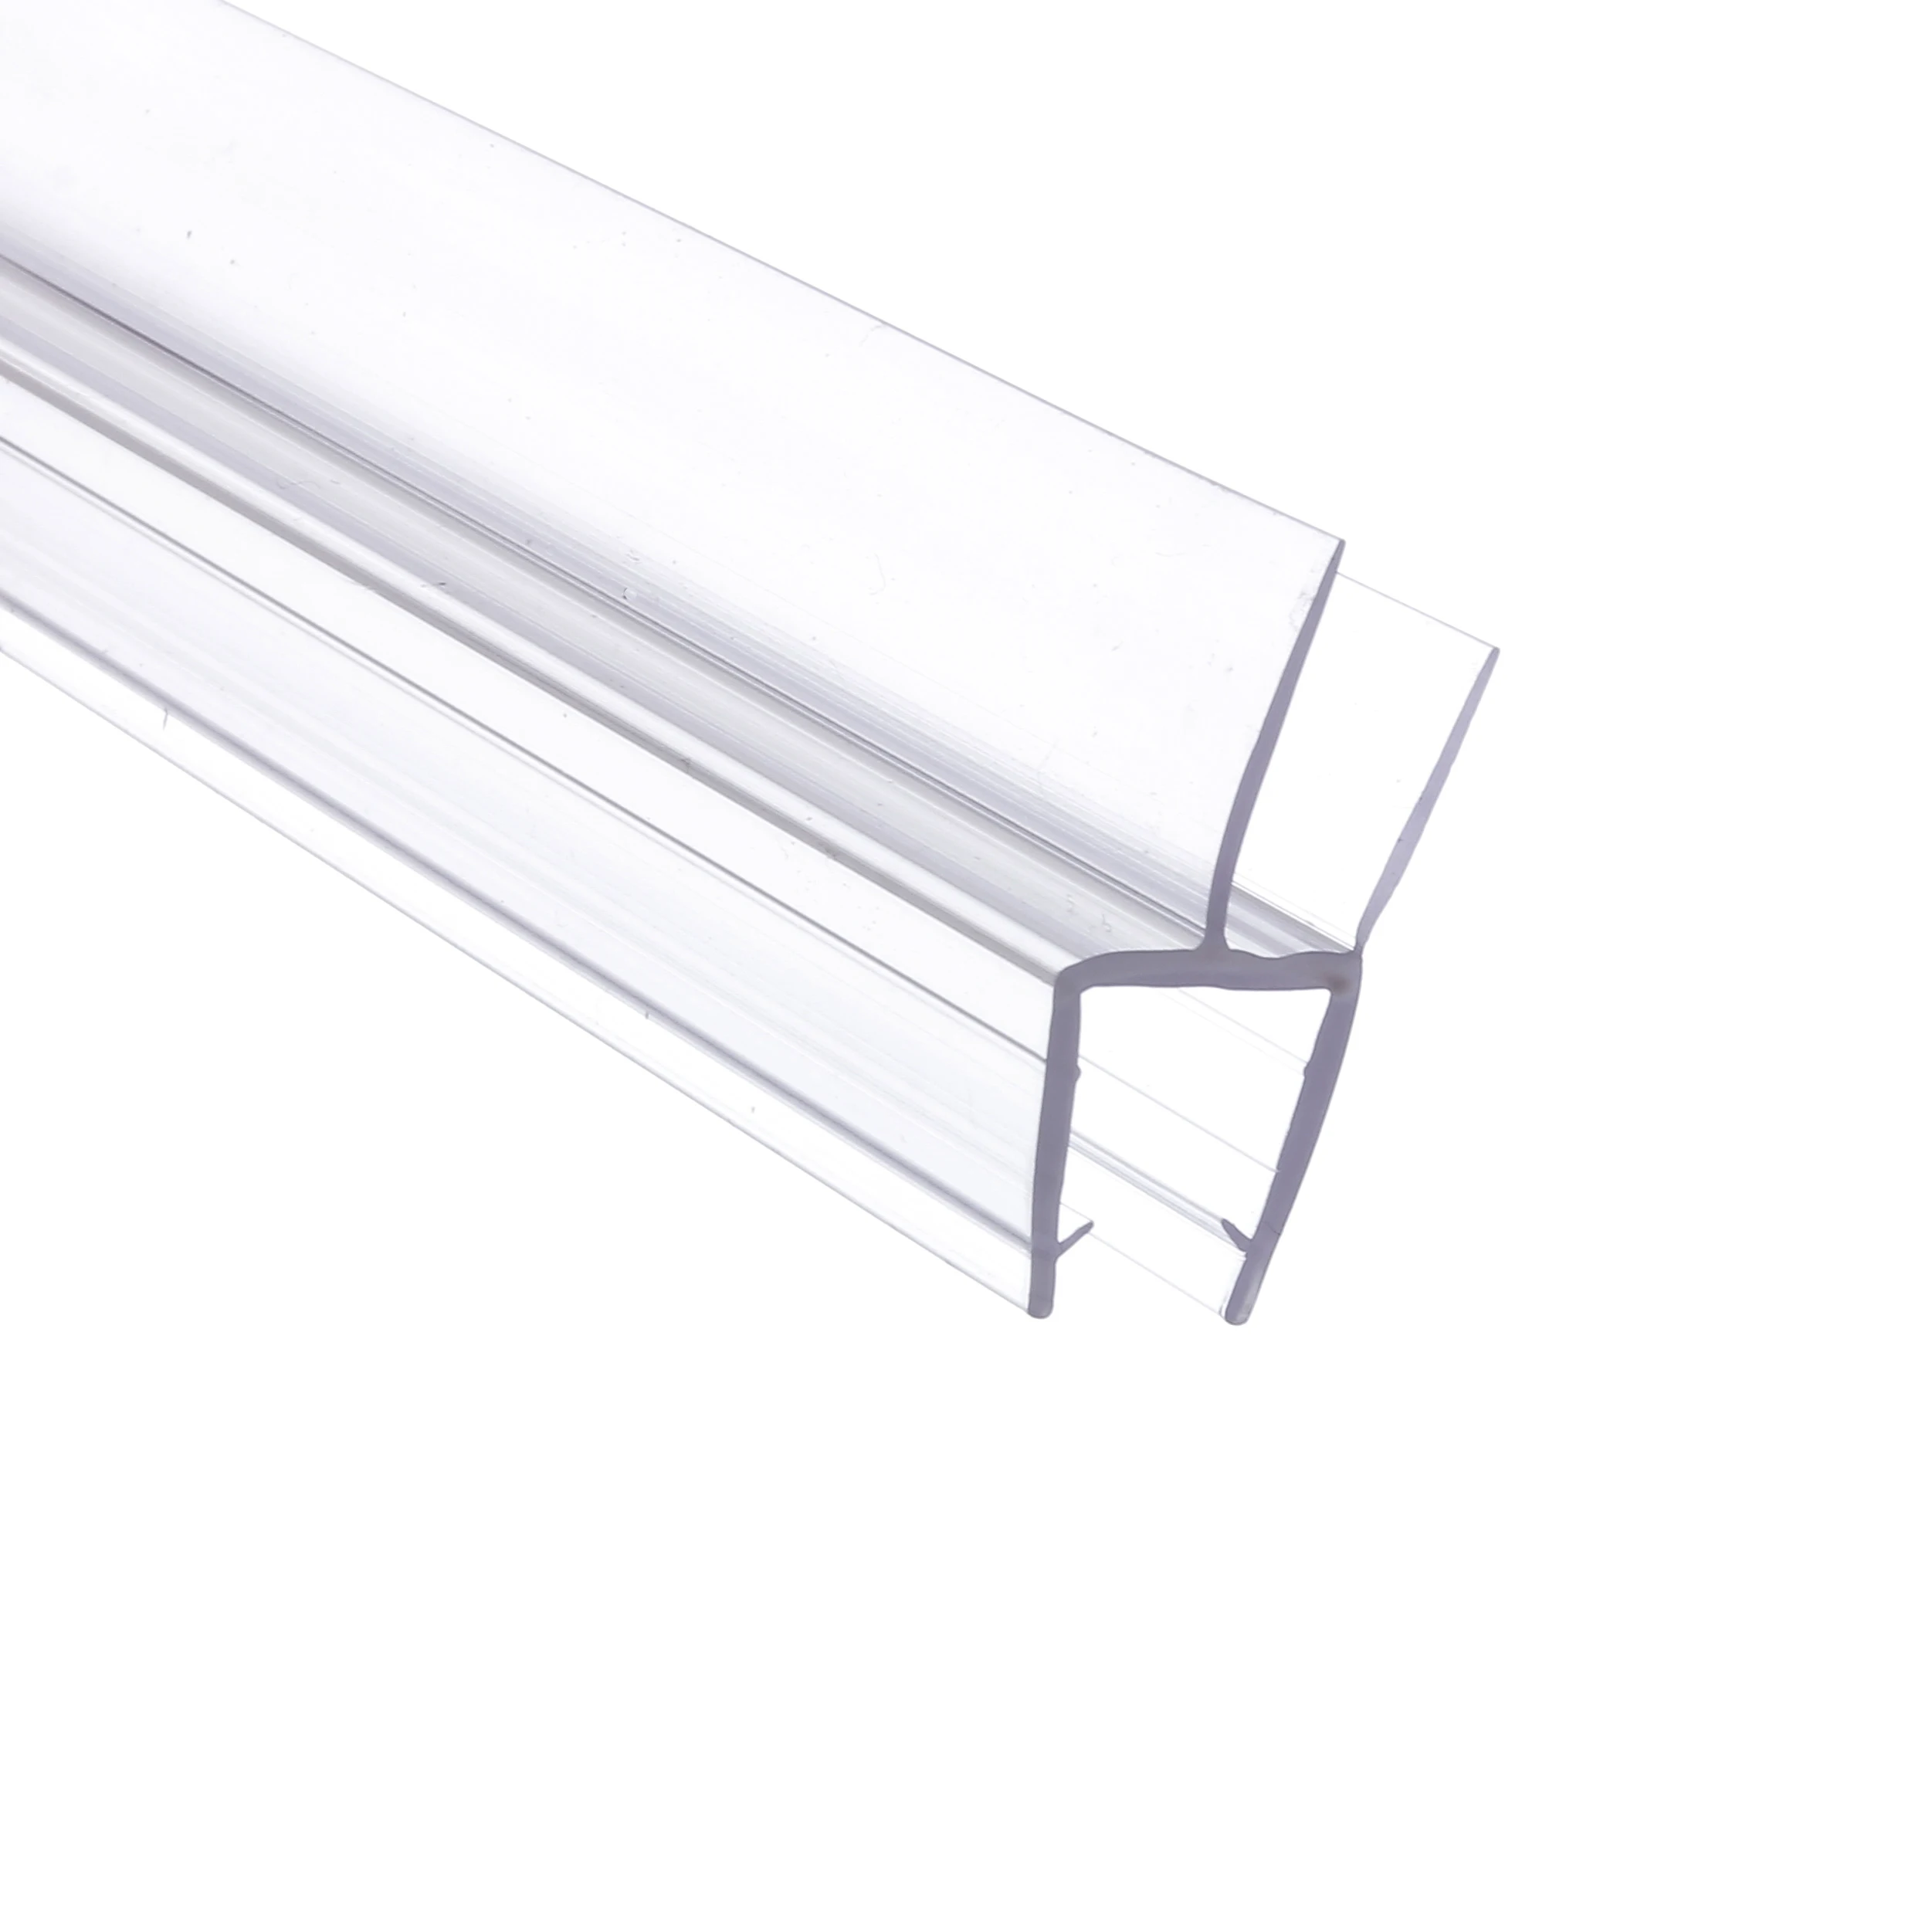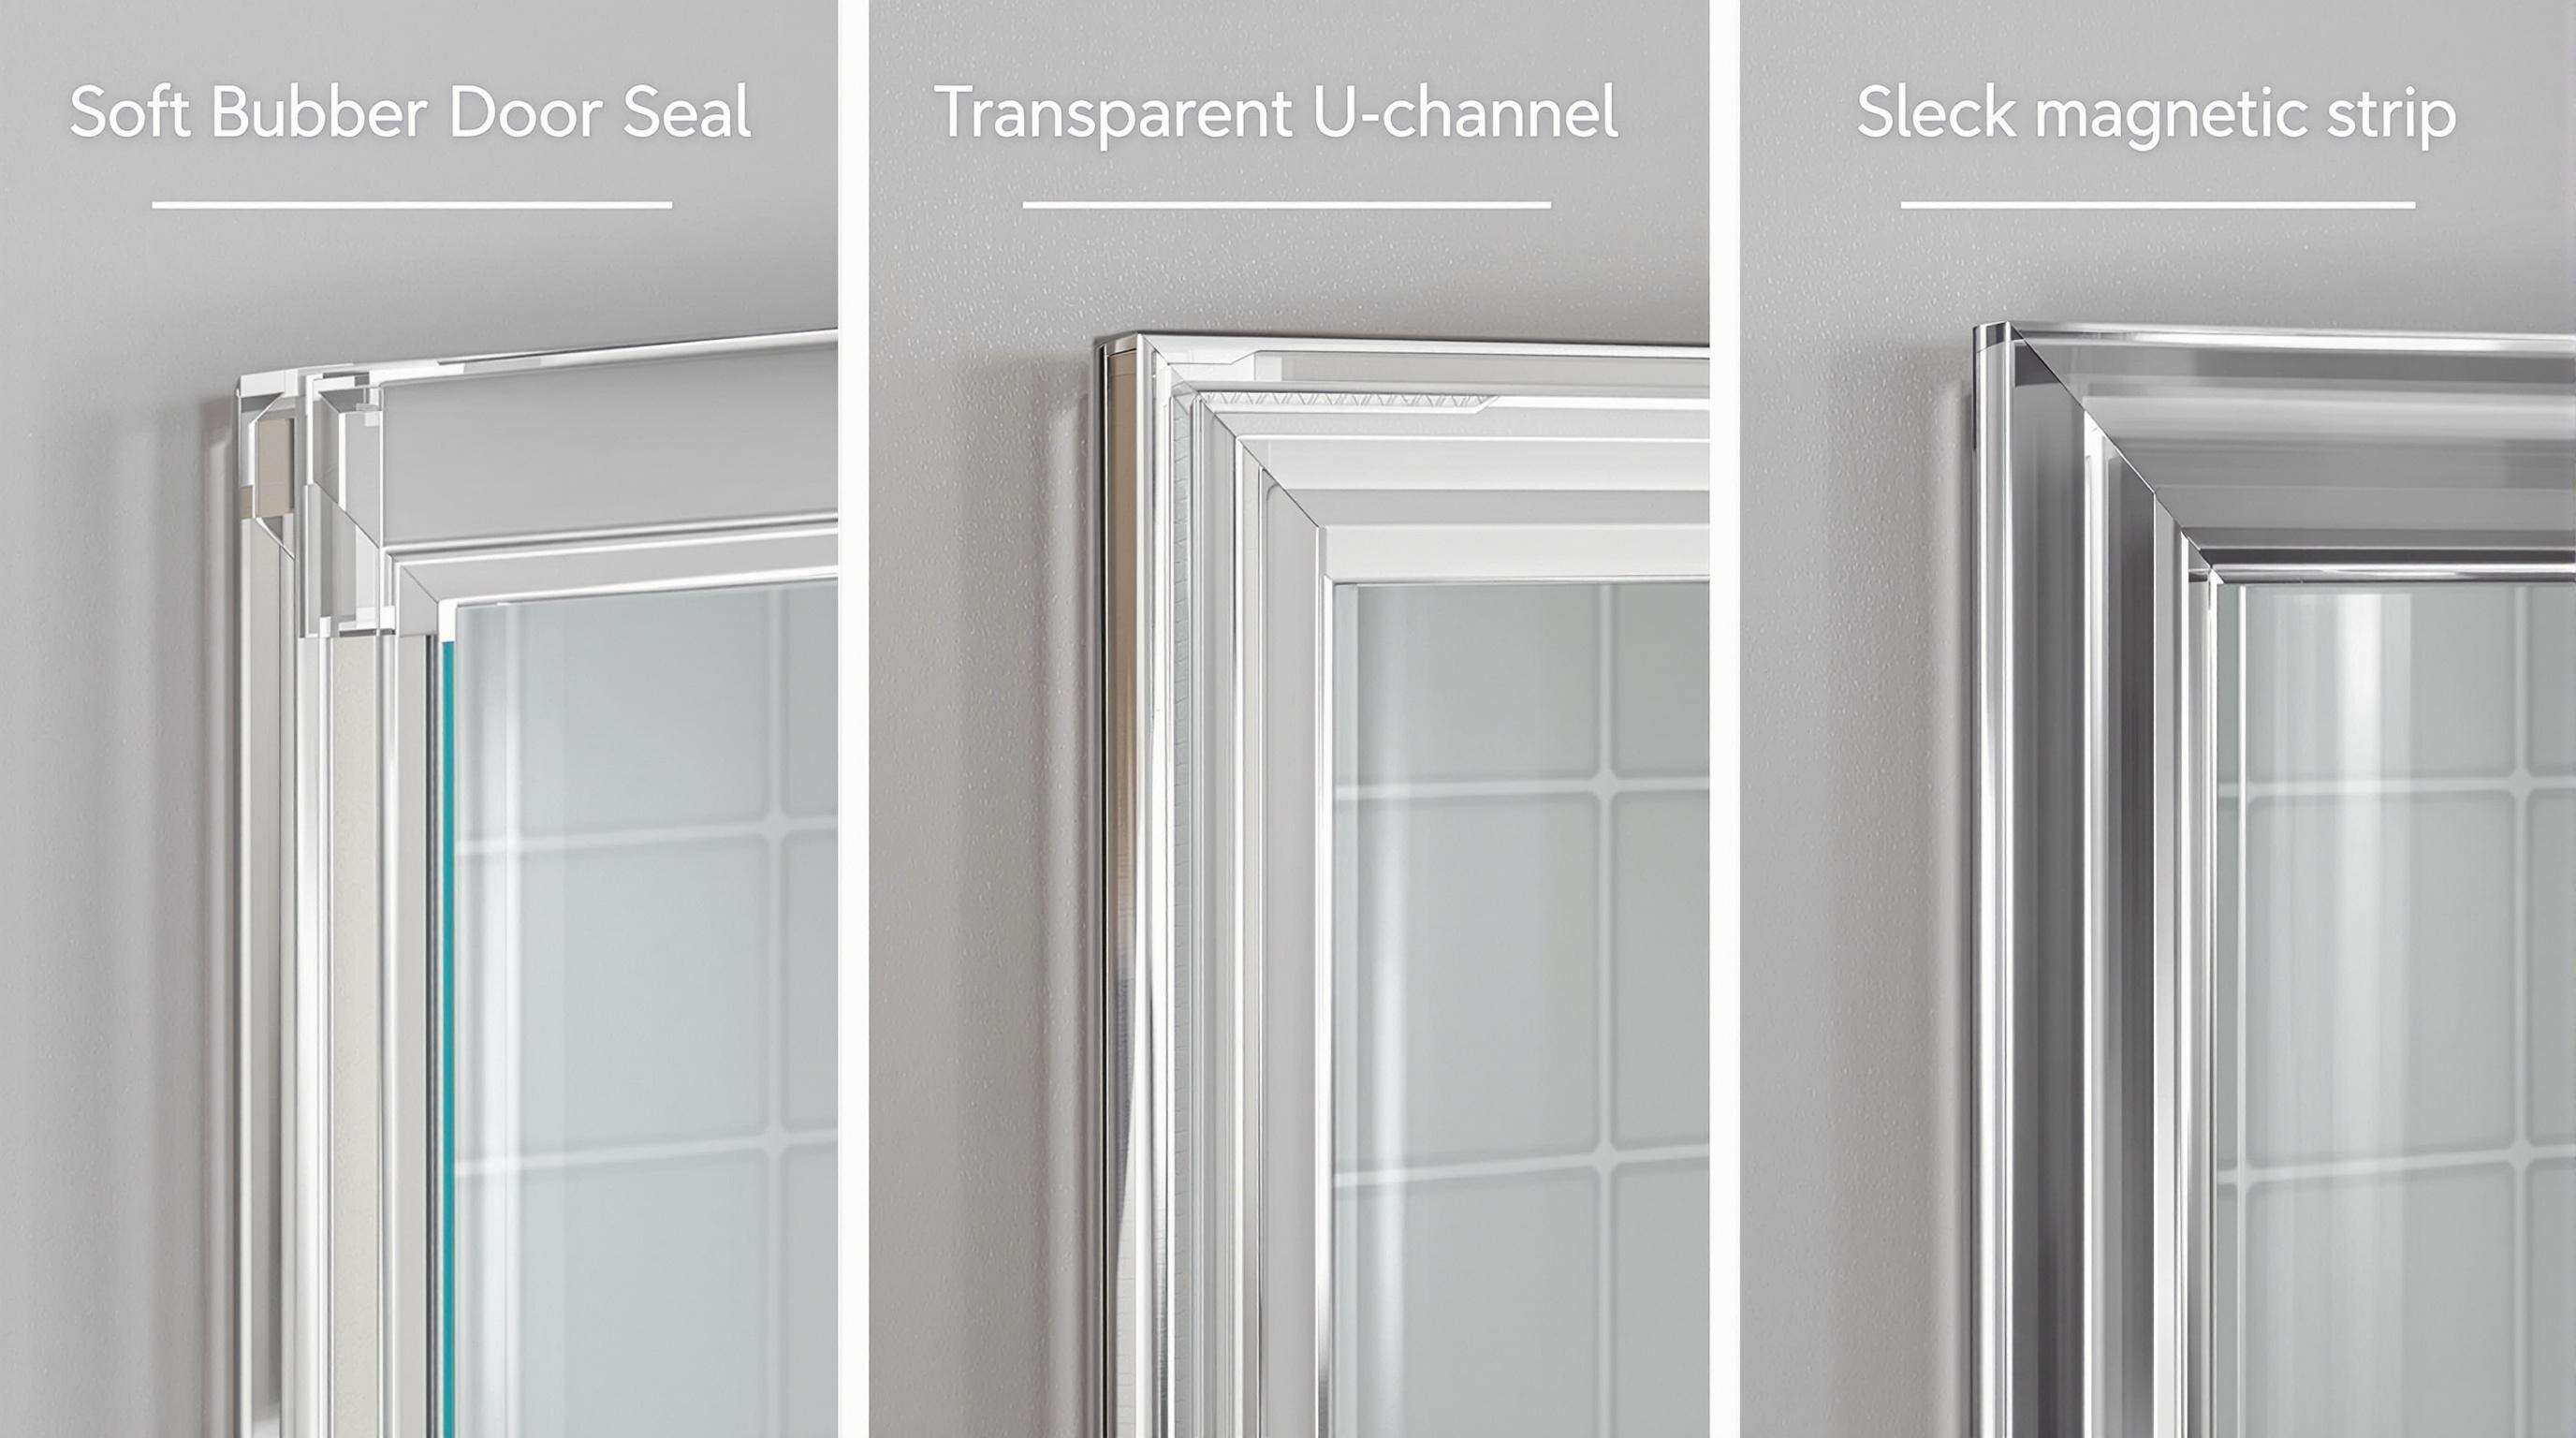
Most showers today rely on three main kinds of seals to keep water where it belongs. First up are bumper seals, which work like soft cushions between the door and frame, preventing those annoying bangs when opening pivot style doors. Then there's the U-channel variety that grabs hold of glass panels about 3/8 to half an inch thick through a clever groove and clip system, making them popular choice for sliding doors. Finally magnetic seals have become quite trendy lately, especially for sleek frameless designs. These contain tiny magnets built into strips along the edges that automatically snap shut, creating tight seals without visible hardware while keeping splashes at bay much better than traditional options.
Examine your door’s movement pattern and existing hardware. Sliding doors with visible tracks typically require U-channel seals, while frameless models benefit from magnetic variants. Measure the gap between glass panels—seals exceeding 0.2" thickness often indicate bumper-style solutions designed for impact absorption.
Vinyl works well for lightweight 1/4" glass in framed enclosures, while reinforced EPDM rubber supports 1/2" frameless panels. Metal-framed systems pair best with rigid PVC U-channels, whereas silicone seals prevent corrosion in humidity-prone, unframed setups. Always cross-check manufacturer specifications against your glass’s edge profile to ensure compatibility.
Universal seals reduce costs by 40% but often require trimming for angled edges. Brand-specific options guarantee precise alignment with proprietary hardware, reducing leakage risks. However, they cost 50–70% more and may require specialized tools, making them better suited for long-term installations than DIY fixes.
For installing shower door seals, gather some essential items first. Silicone adhesive works best, along with that 100% pure ethanol cleaner everyone recommends. Don't forget good quality cutting tools either, maybe something like a rotary trimmer for clean edges. A recent study in the plumbing field found that pros using these specific materials made about 40% fewer mistakes during installations than folks relying on whatever they had lying around. Smart move indeed. Also worth having around are those lint free microfiber cloths to wipe down surfaces properly before applying anything. And digital calipers come in handy when measuring out that adhesive strip width between 3 to 5 millimeters. Getting these details right makes all the difference in how well the seal holds up over time.
Silicone adhesives with low VOC content stay flexible even when temperatures drop below freezing down to around -20 degrees Fahrenheit and still work well up past 180 degrees too. They also stand up better against mold compared to regular caulk options available on the market today. For those tricky corners at about 45 degree angles, adding a bit of food grade lubricant such as PDMS makes insertion much easier while keeping the bond strong enough for most applications. The numbers don't lie either. A study from the Waterproofing Council back in 2022 found that projects relying on petroleum based materials had roughly two thirds failing completely within just eighteen months of installation. That's pretty shocking when you think about it.
When seals get stretched past that 5% mark, they just won't go back to normal anymore. Most folks don't realize this but heat guns set above around 140 degrees Fahrenheit will actually start warping those PVC profiles. Better safe than sorry right? For best results, work with seals when temps are between about 65 and 75 in the shop. Nylon pry bars work wonders here while metal scrapers tend to cause more problems than they solve. Some interesting numbers come out of recent studies too. Around 8 out of 10 DIY enthusiasts who took care to avoid these common mistakes ended up with completely leak free installations lasting well over five years. Compare that to only about 1 in 5 people who tried to rush through the job and ended up with all sorts of issues down the road.
Start cutting old seals vertically with a utility knife to get those stubborn adhesives loose. Use a hair dryer set to low heat around 140 degrees Fahrenheit or so to warm up tough silicone seals. The heat makes them softer and easier to work with without cracking the glass. Always start peeling from the corners first, and grab some plastic pry tools for the job. Metal scrapers just leave scratches on tempered glass surfaces. According to recent studies from the Bath Safety Institute in 2023, about one out of every four shower door replacements happens because folks didn't remove old seals properly. Take your time with this step it really matters for long term results.
When dealing with leftover adhesive residue, mixing up some 70% plus isopropyl alcohol works wonders alongside those plastic razor scrapers for breaking down stubborn bonds without scratching anything. Give it about 15 seconds to work its magic before grabbing a microfiber cloth to wipe away what's left. Don't go near acetone based products though they might seem tempting because these bad boys will actually eat into glass over time. Now for those tricky textured areas around the edges, reach for nylon brushes soaked in white vinegar solution. This helps tackle those pesky alkaline buildups without compromising the surface underneath. Just be careful not to scrub too hard in these spots since the texture makes things a bit trickier to clean thoroughly.
To check for problems, look closely at clean edges using good lighting and angle them around 45 degrees. This helps spot those tiny chips deeper than 1mm, stress cracks forming at corners, or areas where thickness isn't consistent throughout. Try running some cotton swabs along the edges too. If the fibers catch or snag, that's usually a sign there are sharp spots needing attention through polishing work. Industry reports suggest that roughly 8 out of 10 early seal failures actually come down to these kinds of hidden edge issues according to Glass Safety Council findings from last year. For small fixes, grab some diamond sanding pads ranging between 1000 to 3000 grit and tackle those minor blemishes first. Getting rid of these little problems now saves headaches later when seals start failing unexpectedly.
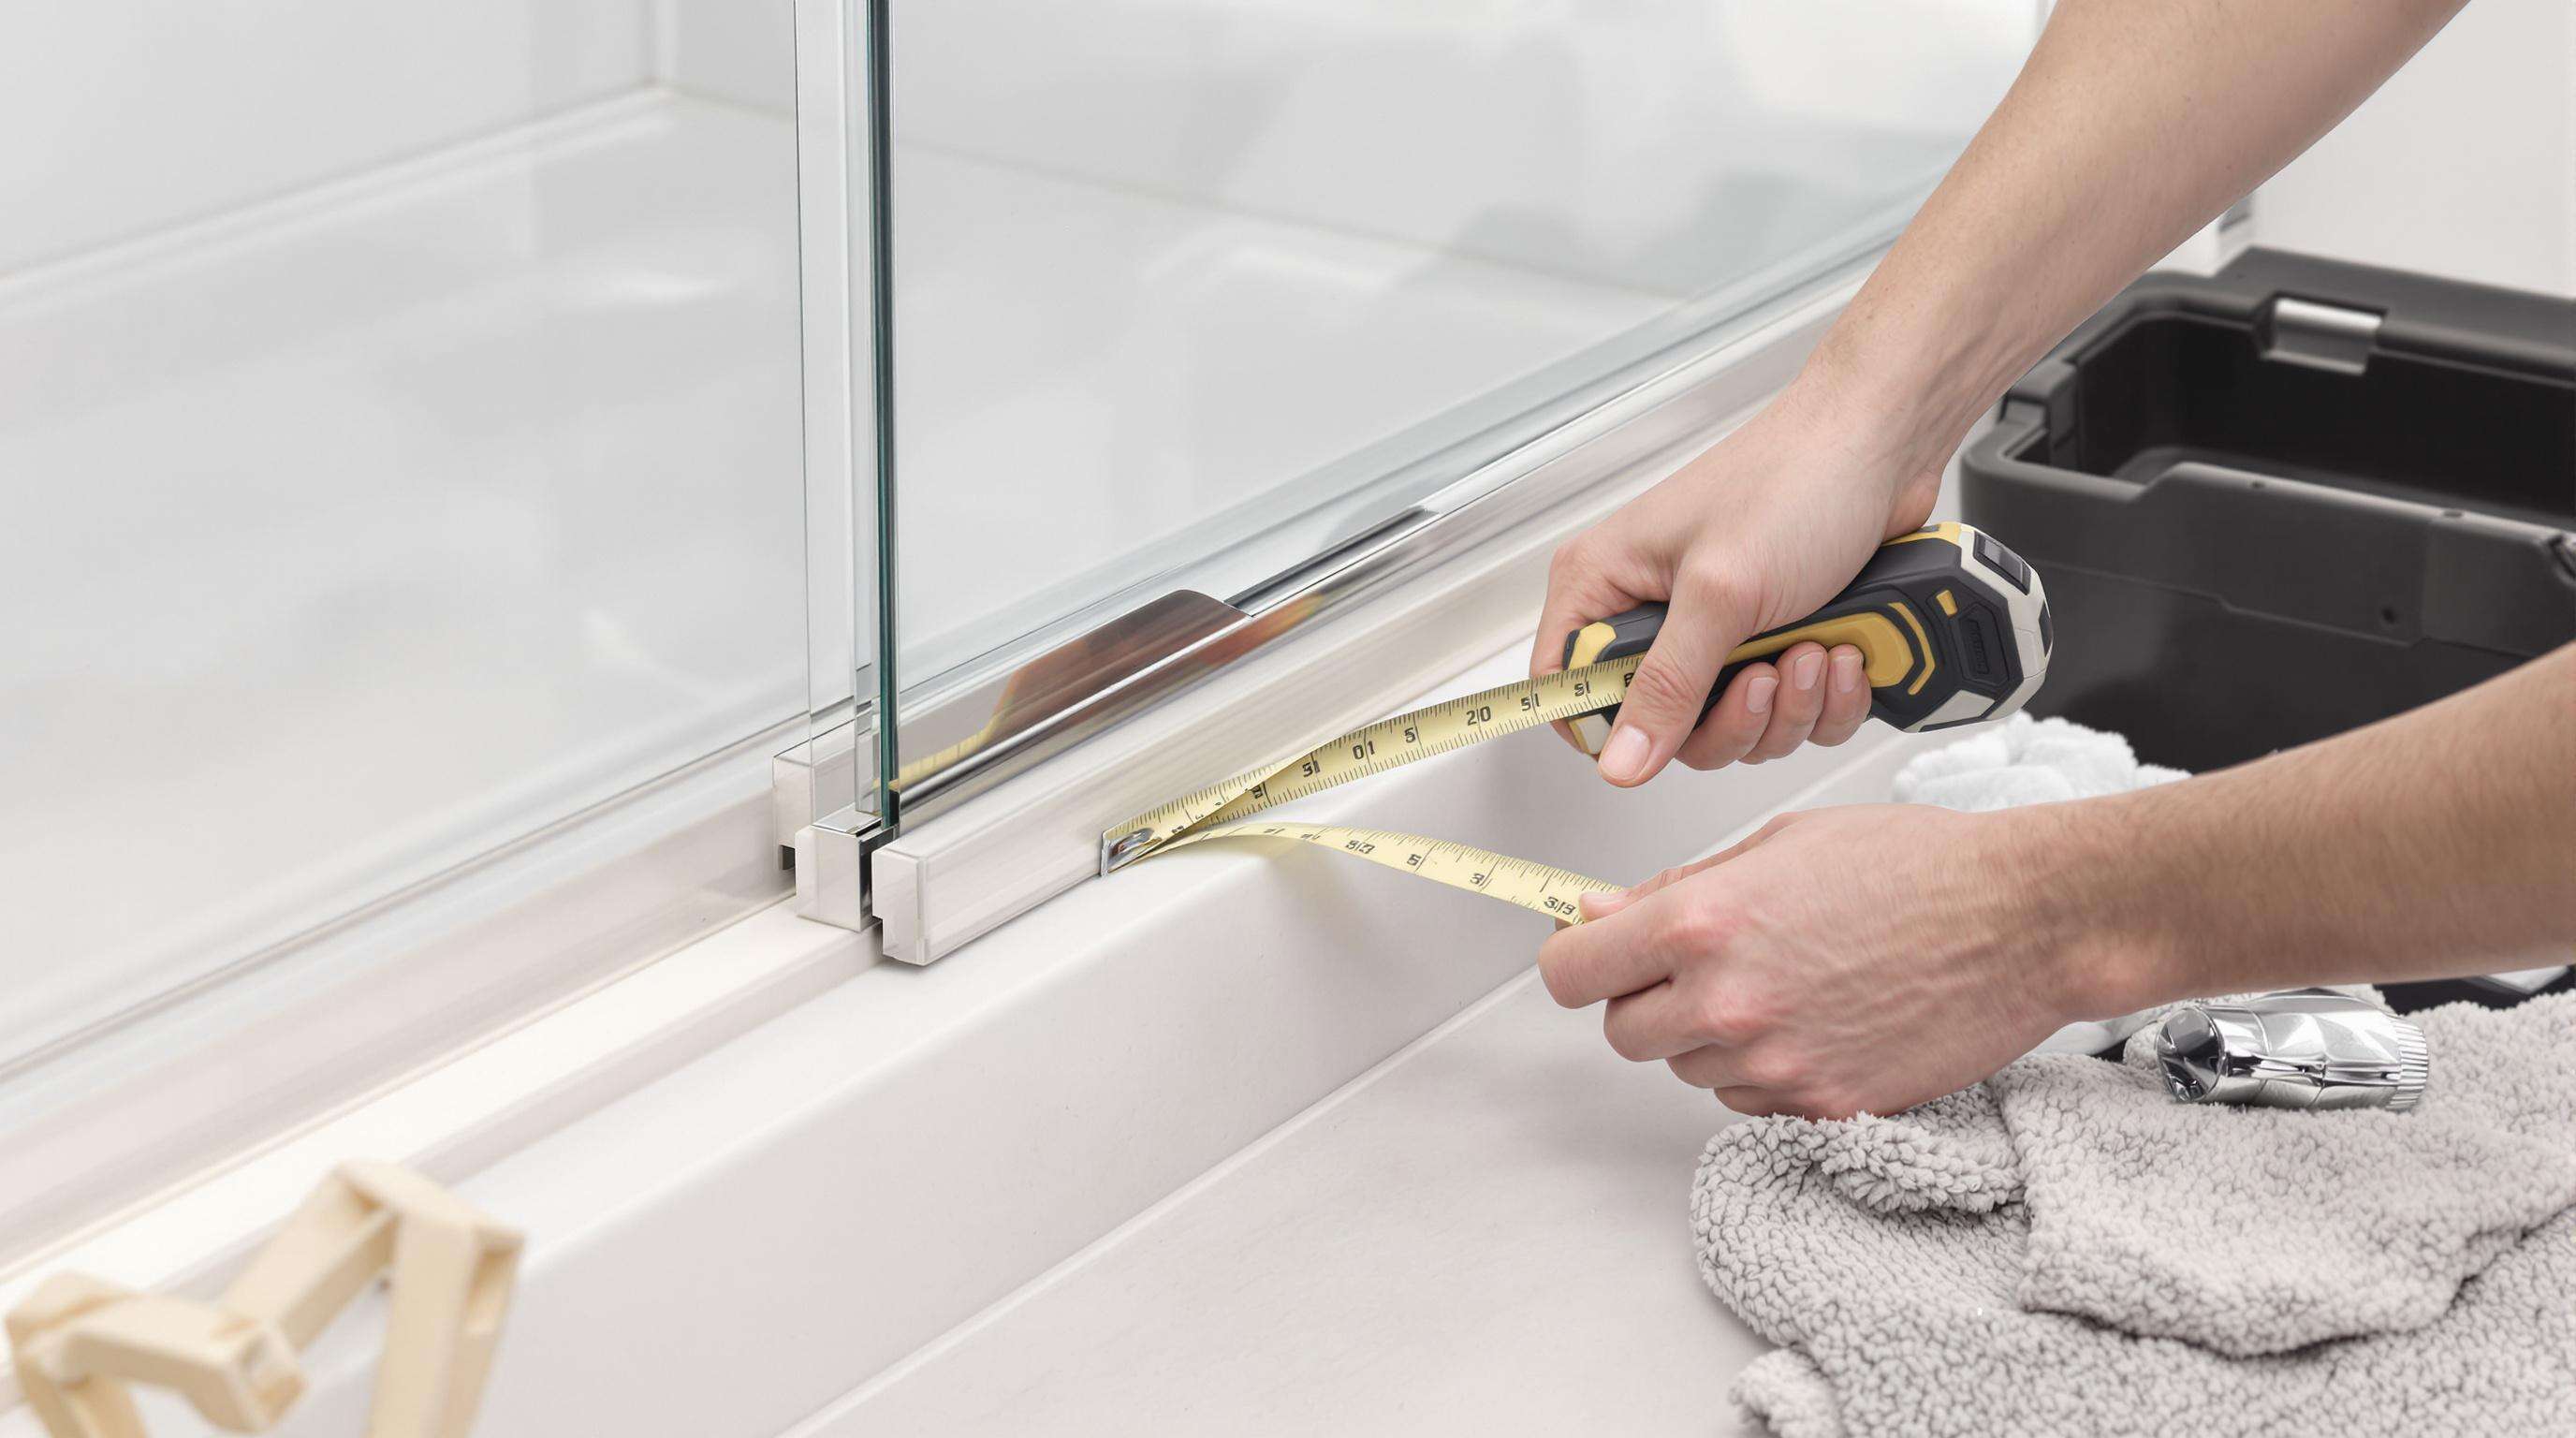
Start by measuring the shower door edge’s length using a flexible tape measure. For curved edges, mark the contour with soapstone or a washable marker to avoid gaps. Professionals recommend taking three measurements and averaging them—this reduces errors by 25% compared to single measurements (Bath Safety Institute 2022).
Always add a 1/8" expansion gap to account for temperature fluctuations. Seals cut too short create leaks, while overly compressed seals warp within months. For frameless doors, match the seal’s compression rating to your glass thickness:
Use a razor-sharp utility knife and a miter box for angled cuts. Lightly heating the blade with a lighter creates smoother edges and prevents fraying in vinyl or rubber. Never use scissors, as they produce uneven cuts that compromise the waterproof seal.
Install corner sections first, working outward in both directions. Apply silicone lubricant to the seal’s inner channel before fitting—this reduces friction by 40% and prevents tearing during adjustments. For L-shaped showers, pre-form corners using a heat gun at 150°F for 10 seconds to set the angle.
A 2022 renovation project required replacing 120 linear feet of shower door seals. Contractors used single measurements without accounting for glass expansion, resulting in 36 feet of misaligned seals. Correcting the error added $1,200 in labor and delayed the project by two days—a preventable cost with proper measuring protocols.
Getting those shower door seals right starts with figuring out which way they should face. When mounted inside the frame, these seals push water back into the shower area, making them great for doors that open towards the bathroom. Doors that swing outwards need their seals positioned differently though. Press fit seals work by gripping through friction, so they're pretty easy to tweak if needed. The ones with adhesive backing stick much better though, especially when dealing with uneven surfaces around the shower frame. According to some research from last year in the glass hardware industry, adhesive sealed doors required resurfacing about 40 percent less often than press fit versions in bathrooms where moisture levels run high all day long.
After installation, conduct a 10-minute water test:
There are three main types of shower door seals used: bumper seals, U-channel seals, and magnetic seals. Each type has its specific application depending on the design of the shower door.
To identify the right seal type, examine the door's movement pattern and existing hardware. Sliding doors typically use U-channel seals, while frameless models often require magnetic seals. Checking the gap between glass panels can also indicate the appropriate seal type.
Essential tools include utility knives, measuring tapes, and cleaning supplies like silicone adhesive and pure ethanol cleaner. A rotary trimmer, microfiber cloths, and digital calipers are also helpful for precise installation.
Inspect the glass edge for damage before installation, measure correctly, and avoid common mistakes like overstretching seals. Use recommended adhesives and lubricants to ensure long-term performance.
Regular cleaning with a vinegar-water solution, monthly lubrication of door tracks, and replacing compressed or shrunken seals can extend the seal's life by several years.
 Hot News
2025-06-16
2025-06-25
Jinsu (Guilin) Plastic Profiles Co., Ltd is a leading Chinese manufacturer of custom PVC shower door seals and window gaskets. With 20 production lines and 80+ technicians, we deliver durable, waterproof sealing solutions for bathrooms and industrial applications. Trusted by clients in Europe and America. Request a quote today.
Copyright © 2025 by JinSu (Guilin) Plastic Profiles Co.,Ltd Privacy Policy